
Crawl Cove ships as a standard Windows installer. There is no account to create, nothing to sync, and no cloud setup step — you run the installer, click through a SmartScreen prompt once, and land on the Agency Dashboard. This guide walks the whole path and explains exactly what the app writes to your machine on first run.
Note
What you'll need: the Crawl Cove Setup.exe installer, a Windows 10 or 11
machine, and about 5 minutes. No API keys or internet account are required to
install — those come later, only for the optional integrations.
1. Run the installer
- Obtain
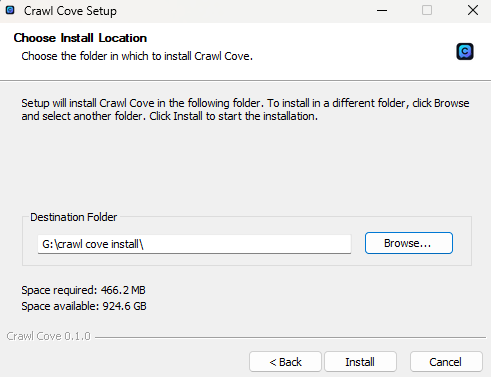
Crawl Cove-<version>-Setup.exe. - Double-click it. The installer is an assisted NSIS flow, so you can choose the install directory rather than having one forced on you.
- Follow the prompts to the end. Installation is local — nothing is fetched from a vendor backend.
2. Get past Windows SmartScreen
Heads up
The current build is unsigned, so on first launch Windows SmartScreen may warn that the app is unrecognised. This is expected. Click More info, then Run anyway. Code signing is a planned future addition — it needs only a certificate, no change to the app itself, so a signed build will install without the prompt.
SmartScreen flags any installer it hasn't seen signed by a known publisher yet; it is not a sign that anything is wrong with the download. Once you have clicked Run anyway the first time, Windows remembers your choice.
3. First launch and the self-check
On launch, Crawl Cove runs a backend self-check before showing you anything. If the local database opens cleanly, the app drops you straight onto the Agency Dashboard — the global landing page that triages every client you manage.
If the database fails to open, you get an honest error screen that names the problem, not a dead blank window. The app is designed to degrade visibly: a failure tells you what went wrong rather than hiding it.
A healthy first launch leaves you on the Agency Dashboard with no clients yet — that's your cue to add your first one.
What the app writes to your machine
This is where local-first stops being a slogan and becomes a file path. On first run Crawl Cove creates two things in your user-data folder:
- A local database at
<userData>/crawlcove.db— every client, crawl, finding, and keyword you ever record lives here, in SQLite, on your own disk. - An encrypted secrets folder at
<userData>/secrets/— OAuth tokens and API keys are written here via the operating system's secure storage, never into the database and never across the network.
Tip
Nothing phones home. There is no SaaS backend behind Crawl Cove, so your clients' data and access tokens never leave your computer. For agencies handling sites under NDA, "the data is on my machine, the secrets are encrypted, and nothing is uploaded" is an answer you can give a client with a straight face.
That separation matters: the database holds your work, the secrets folder holds your credentials, and the two are kept apart by design. When you later back up your data, the database snapshot deliberately excludes the secrets folder — credentials never leave secure storage.
You're installed — what next?
With the Agency Dashboard open, you have a working, private SEO audit app. The next two steps get you to your first real findings:
Next
- A tour of the interface: agency vs client — learn the two navigation levels before you dive in.
- Adding your first client — the five-minute onboarding wizard.